
Wordpress:ビデオを埋め込む-仕組み
Wordpressにビデオを埋め込むには、いくつかの手順を実行する必要があります。 この実用的なヒントを使用して、その仕組みを説明します。
Wordpress:ビデオを投稿に挿入する
ビデオをまったく統合できるようにするには、まずYouTubeなどで対応するビデオを選択する必要があります。
- WordPressの投稿を呼び出して、ビデオを埋め込む場所にカーソルを置きます。 次に、ソーステキスト、つまりHTMLビューに切り替えて、埋め込みコードを挿入します。
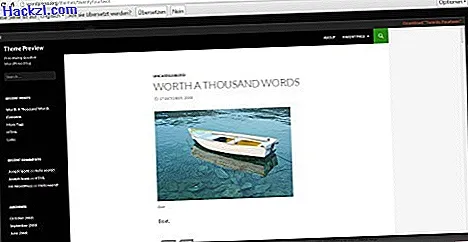
- たとえば、YouTubeのビデオを右クリックし、「埋め込みコードをコピー」を選択します(画像を参照)。
- 次に、WordPressビューに切り替えて、目的の場所にコードを挿入します。 オンラインで表示できるように、投稿を更新して保存します。

ビデオを埋め込むためのヒント
上記の手順により、ビデオはすでにオンラインになっているため、何も変更する必要はありません。 ただし、ビデオをカスタマイズすることはできます。 これを行うには、HTMLビューを再度開き、コード内で「player-detailpage」という名前を探します。 「;」を追加することにより これで、さらにコマンドを決定できます。
- ビデオは自動的に開始するはずです:「;」の後ろに追加します 「autoplay = 1」という名前。 次に、ページに移動するとビデオが自動的に開始されます。
- 下のバーは非表示になります:「;」の後ろに入力します コマンド「controls = 0」。 下のバーが消え、誰もビデオを早送りしたり巻き戻したりできません。
- トップバーは非表示にする必要があります。「;」の後ろに結び付けます。 「showinfo = 0」という言葉。 これがYouTubeビデオであるとは誰も見ていません。
- これにはJWプレーヤーを使用するのが最適です。 プレーヤーがWordpressにインストールされている場合は、メディアライブラリを開くことができます。 ここには、「JWプレーヤーの挿入」ボタンがあります。
- その後、ムービーファイルを選択すると、プレーヤーはビデオをアップロードし、Wordpressに埋め込みます。
- このプレーヤーの特別な点は、HTML5ビデオとFlashをサポートしていることです。 さらに、ビデオはコンピューターに統合できるだけでなく、外出先(iPhoneまたはiPad)でも統合できます。
- 左上の[ファイルの追加]をクリックし、サブメニューで[ファイルの追加]機能を選択します。 [ファイルを選択]ボタンをクリックすると、コンピューターから適切なビデオファイルを選択してアップロードできます。
- ファイルがアップロードされると、右下にドロップダウンメニューが表示されます。 このメニューでは、アイテム「統合メディアプレーヤー」を選択する必要があります。 [投稿に挿入]ボタンをクリックすると、動画が投稿に追加され、保存後すぐにオンラインになります。
CHIP Academyの大きなワークショップ:「Wordpress:最初のWebサイトへのステップバイステップ」
CHIP Academyのコースでは、初心者でもWordPressブログシステムでページを作成する方法を学びます。 詳細な手順で、ユーザーはWordPressのインストール、設定、最適化の方法を学びます。
- テンプレートを使用してWordpressを変更し、プラグインを使用して機能を追加し、マルチメディアファイルを統合し、ブログシステムを管理する方法を6.5時間以上学びます。
- また、新しく作成されたページを攻撃者から保護する方法と、適切なSEO戦略を備えた検索エンジンに適したページにする方法についても学習します。
- CHIP Academyにアクセスして、39.90ユーロの広範なオンラインビデオワークショップを受講してください。

他の実用的なヒントでは、Wordpressの言語をドイツ語に設定する方法、ゲストブックを埋め込む方法、ニュースレターを設定する方法、またはWordpressで広告を無効にする方法も学習します。