
Windows 8.1:VPNのセットアップ-仕組み
たとえば、自宅から会社のネットワークにアクセスするには、VPN接続をセットアップする必要があります。 この実用的なヒントは、Windows 8.1でVPNネットワークに接続する方法を示しています。
Windows 8.1でVPNネットワークをセットアップする
以下の手順に従って、Windows 8.1でVPNネットワークをセットアップします。
- ネットワークシンボルを右クリックして、選択ウィンドウを開きます。 ネットワークアイコンは、タスクバーの右下隅にあります。
- [ネットワークと共有センターを開く]をクリックします。
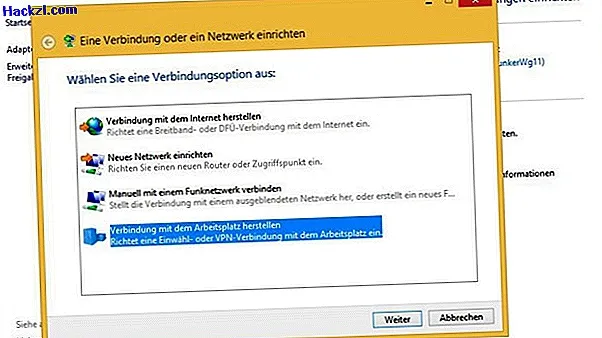
- 開いているネットワークと共有センターで、「新しい接続またはネットワークを設定する」を選択します。
- ここで、最下部の「職場との接続を確立する」をクリックする必要があります。
- 接続が既に設定されている場合は、「いいえ、新しい接続を作成します」を選択します。
- 次に、リストの[インターネット接続(VPN)を使用する]をクリックする必要があります。
- 次のウィンドウでVPNサーバーのIPアドレスを入力します。 ここで接続の名前を定義することもできます。 最後に「作成」をクリックして、VPN接続の構成を保存します。
Windows 8.1でVPNネットワークに接続する
作成されたVPN接続をアクティブにするには、次の2つの手順のみが必要です。
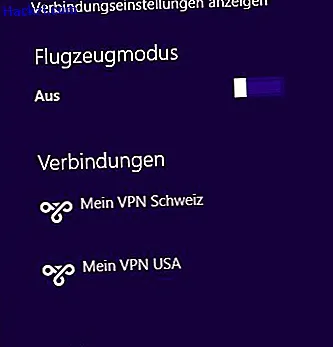
- タスクバーの右下隅にあるネットワークアイコンを左クリックします。
- [接続]で新しいVPN接続を選択します。 初めて接続するときは、アクセスデータを入力する必要があります。 これを永久に保存できます。
別のVPNプロバイダーが必要な場合は、5つの最高のプロバイダーを比較しました。