
Windows 10:ホットスポットを作成して設定する-方法は次のとおりです
インターネット接続を他のユーザーと共有する場合は、Windows 10でホットスポットを設定できます。 手順を追って説明します。
Windows 10でホットスポットを作成する
- Windows 10の[スタート]メニューを開き、左下隅の歯車アイコンをクリックします。
- 設定が完了したら、「ネットワークとインターネット」カテゴリを選択します。
- 左下の「モバイルホットスポット」に移動し、上部でオンにします。
- [編集]ボタンを使用して、ホットスポットの名前と関連するパスワードを変更できます。
- ヒント:次の実用的なヒントでは、安全なパスワードの外観とパスワードのセキュリティを確認する方法を示します。

または、オタクのようなホットスポットを作成します
注:このガイドを実行するには、ネットワークカードがホストモードをサポートしている必要があります。 そうでない場合は、次のパラグラフの指示でお手伝いします。 上記の手順を使用して、ホットスポットをはるかに速く簡単に作成できるようになりました。
- 下のWindowsアイコンを右クリックし、「コマンドプロンプト(管理者)」を選択します。
- 「はい」でこれを確認すると、黒いコンソールが開きます。 他の設定はここで行います。
- コマンド「netsh wlan set hostsnetwork mode = allow ssid = NAME key = PASSWORD」を入力し、[Enter]キーで確認します。
- ただし、「NAME」と「PASSWORD」という単語については、独自のネットワーク名と独自のWLANパスワードを入力できます。 このデータは自由に選択できます。
- その後、コマンド「netsh wlan start hostsnetwork」を入力すると、ホットスポットが開始されます。
- ウィンドウを閉じ、コントロールパネルを開き、カテゴリ「ネットワークとインターネット」を選択します。
- [ネットワークと共有センター]に移動し、左側の[アダプター設定]を選択します。
- ホットスポットと共有するネットワークを右クリックして、「共有」オプションを選択します。
- 「ネットワーク上の他のユーザーがコンピューターからこの接続をインターネット接続として使用できるようにする」オプションを有効にして、ホットスポットを選択します。
- ホットスポットの接続準備ができたら、ウィンドウを閉じます。

Windows 10のヒント:ソフトウェア経由でホットスポットを開く
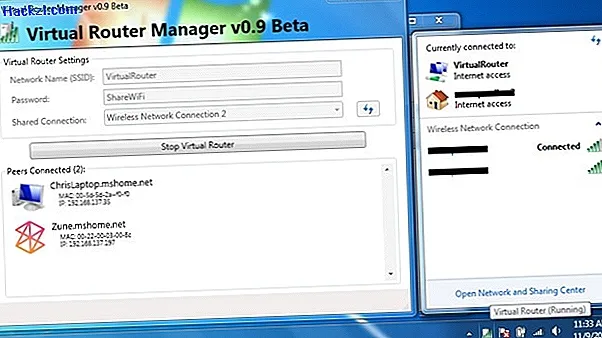
- または、ソフトウェアを使用してホットスポットを設定できます。 Virutal Routerプログラムは完全に無料で、わずかな手順で機能的なホットスポットを作成します。
- WiFiネットワークを友人や訪問者と共有する場合、Windows 10で新しい機能を使用してこれを行うことができます。 ここでは、Windows 10でのWiFiネットワークの共有に関する詳細情報を見つけることができます。
次の実用的なヒントでは、CDなしでWindows 10を復元する方法を示します。