
gimpでの煙効果-仕組み
Gimpでは、印象的な煙の効果を作成し、写真に蒸気と煙を入れることができます。 手順と画像ギャラリーはこちらにあります。
Gimp:IWarpフィルターで煙効果を作成します
- Gimpを開き、「ファイル」を使用して、おおよそ煙の列のサイズ(幅の2倍以上)の新しいドキュメントを作成します。 次に、背景を白いペンキで塗ります。 このようにして、作業中に煙を後で認識しやすくなります。
- 次に、「新規レイヤー...」を使用してレイヤーメニューに新しいレイヤーを追加し、ダイアログボックスでレイヤーの塗りつぶしタイプとして「透明度」を選択し、「OK」をクリックします。
- 前景色として濃い灰色を設定し、ブラシツールで太い垂直線を描きます。 次に、明るい灰色の陰影と小さいブラシ半径を使用して、2番目のストローク(最初のストロークのほぼ中央)を描画します。 正確に作業することは重要ではありません。ストロークは簡単に曲がったり曲がったりすることがあります。
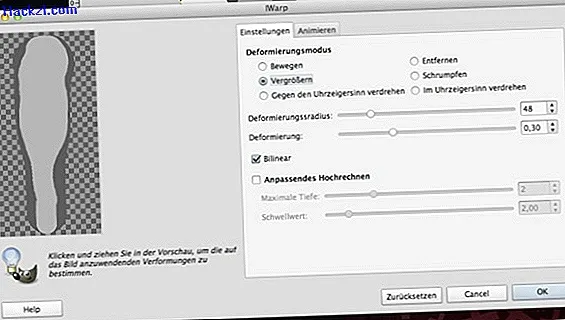
- 「歪み」フィルターの下の「フィルター」メニューにある「IWarp」フィルターを開きます。 「拡大」変形モードと約30〜60の変形半径を選択します。
- 次に、ストロークの中央から上端までマウスボタンを押して、プレビューウィンドウ内を移動します。 必要に応じて、下半分よりも上半分の線がはるかに太くなるまで、このプロセスを1〜2回繰り返します。
- 変形モードを「縮小」に切り替え、ストロークの中央からマウスボタンを押したままプレビューウィンドウ内を移動します。 結果に満足したら、「OK」をクリックします。
- ガウスぼかしを使用して、約10〜20ピクセルの半径で画像をぼかします。 「ぼかし」の下の「フィルター」メニューに「ガウスぼかし」があります。
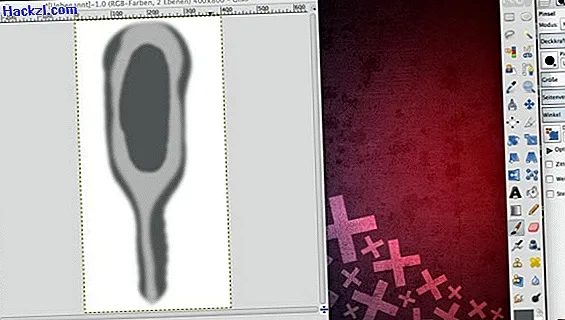
- 次に、スポイトツールを使用して、画像から暗い灰色の陰影を前景色として選択し、ブラシでストロークの上部に楕円を描きます。 繰り返しますが、特に正確に作業することは重要ではありません。
- [フィルター]メニューで[ガウスぼかしの繰り返し]をクリックして、以前に設定した値で画像を再度ソフトにします。
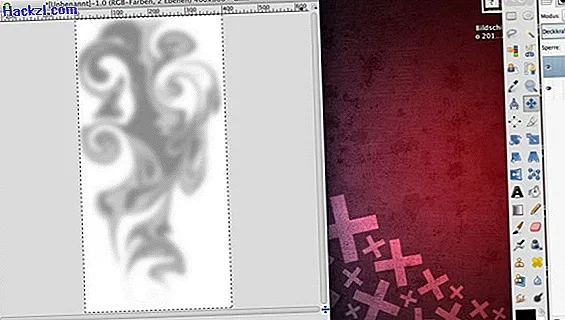
- 「IWarp」フィルターを再度開きますが、今回は変形モードとして「反時計回りにツイスト」を選択します。 プレビューウィンドウで、マウスボタンを押したまま、渦が煙の雲のようになるまで、ストロークを数回上下させます。 次に「OK」をクリックします。
- 20〜30ピクセルの半径を設定して、ガウスぼかしを再度適用します。
- これで、煙のあるレイヤーをコピーして、別の画像に貼り付けることができます。 新しいドキュメントで煙のあるレイヤーの不透明度を少し下げると、全体がよりリアルに見えます。 写真ギャラリーで個々の手順を読み直すことができます。

この実用的なヒントでは、Gimpで輝く星空を作成する方法を学びます。
最新の動画
白い背景に対して透明なレイヤーを作成します。

異なるグレーの濃淡を使用して、太さの異なる2本の垂直線を描画します。

変形モード「拡大」および「縮小」でIWarpフィルターを使用して、煙雲の大まかな輪郭を定義します。
中間結果をガウスぼかしで編集します。

ストロークの上部に濃い灰色の楕円を描き、ガウスぼかしを再適用します。
IWarpフィルターを使用して、「反時計回りの回転」変形モードで渦を挿入します。

最後に、煙を再び柔らかくします。
煙の雲を別の画像に貼り付ける場合は、煙を含むレイヤーの不透明度をわずかに下げます。
