
Photoshop:黄色の色合いを削除する-仕組み
Photoshopの黄色の色合いのような不要なカラーシフトを簡単に削除できます。 この実用的なヒントでは、進む方法を示します。
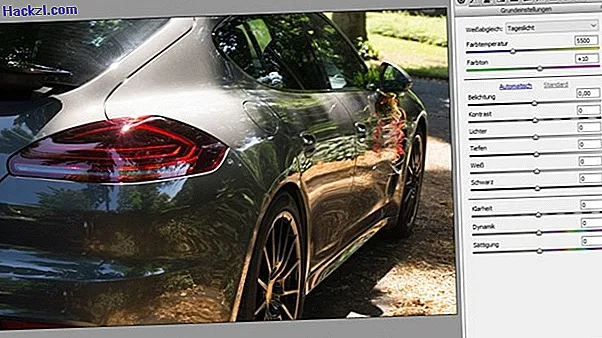
Photoshopで黄色の色合いを取り除く:RAW形式の画像でのホワイトバランス
この問題を解決する最も簡単な方法は、画像をRAW形式にすることです。 Photoshopで開くと、大きなダイアログウィンドウが自動的に表示され、あらゆる種類の設定を行うことができます。
- 「ホワイトバランス」ドロップダウンを使用すると、いくつかの定義済みの色温度から選択できます。ほとんどの場合、画像に適した設定が提供されます。 カラーシフトを防ぐために、カメラのホワイトバランスを調整します。
- 別の方法として、色温度コントロールを慎重に使用して、写真から黄色味を取り除くこともできます。 最終的な微調整のために、色調を考慮することを忘れないでください。
- さらに露出設定を行うオプションもあります。
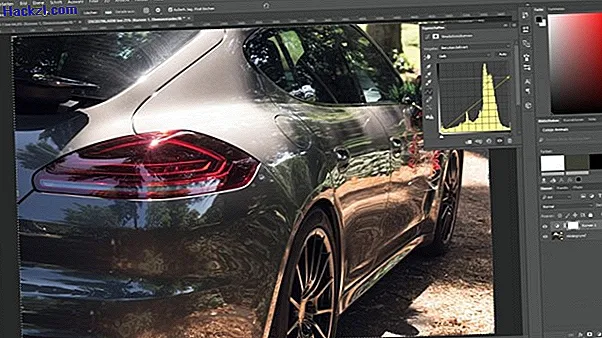
黄色の色合いを削除:CMYKグラデーションカーブによる調整
画像がRAW形式ではなく、JPG形式のみである場合、画像から黄色のトーンを削除する正確な方法がまだあります。
- まず、イメージをCMYK印刷インクに変換して、黄色を単独で色調として処理できるようにします。 これを行うには、「画像」、「モード」、最後に「CMYKカラー」をクリックします。
- CYMKはRGBと比較してより大きな色空間であるため、正確な色調はPhotoshopで評価されます。 これは、カラープロファイルを使用して行われます。 別のダイアログボックスで色の変換を確認する必要があります。
- レベルの概要にある半円のボタンを使用して、新しい設定レベルを作成し、グラデーションカーブを選択します。
- 新しく開いたウィンドウで、下のドロップダウンで黄色を選択できます。 次に、写真の結果が気に入るまで、カウントの右上隅を少し引き下げます。
Photoshopの黄色の色合い:カラーバランスと色相/彩度による調整
黄色の色合いを削除する別のシンプルだが便利な方法は、「カラーバランス」と「色相/彩度」スライダーを使用して調整することです
- [画像]ボタンと[修正]メニュー項目を使用して、[カラーバランス]にアクセスできます。 「色相/彩度」は同じメニューにあります。 あなたが結果が好きになるまで、コントロールで遊んでください。
- この領域の設定はすべて調整する必要があるため、このプロセスはやや面倒で扱いにくいものになります。 ほとんどの場合、一部の画像情報が失われるため、結果はグラデーションカーブほど良くありません。

Adobe Photoshop CC:最初のテストの革新
この実用的なヒントは、Photoshopで目の色を変更する方法を示しています。